• View
Menu

Outdoor Imaging by Brad Terry

Great Lakes. Great Photos.
  • View
LLG_Banner2.jpg

Smart Previews: Are they worth your time?

January 16, 2018

Alright, I feel like we're getting into the nitty gritty of Lightroom with this one. Hopefully you've read the previous blogs and watched previous tutorials. If you have then you've heard me mention Smart Previews. So what are they and should you use them?


OK, so what is a Smart Preview? Well, simply put a Smart Preview is a smaller version of your original photograph. 2560 Pixels long to be exact. Lightroom creates these previews when you tell it to, either at Import or from the Library Module (👈🏻 I keep trying to tell you that the Library Module is important!) by going to Library > Previews > Build Smart Previews. Now just to confuse you a little bit here I'm going to remind you that there are options for "Building Previews" when importing - Minimal, Embedded & Sidecar, Standard and 1:1 - but these are NOT the same as Smart Previews. If you want to build Smart Previews on Import you must have the "Build Smart Previews" checkbox checked. Once the Smart Previews are built - and that can take a long time - they are stored in a separate file - SmartPreviews.lrdata - within the Catalog File.

Above shows how to build Smart Previews from the Library Menu.

Above shows where to check the Build Smart Previews box during an image import.

So why take the time to build Smart Previews? There are two main reasons and I actually take advantage of both. First, since you are working on a smaller version of your image - a smart preview is about 3x smaller than an image file from a full frame camera sensor - it will speed up your processing while in the Develop Module. So all those edits of the highlights and shadows and vibrance etc. all go a little quicker. So that's kind of a big deal. Such a big deal in fact that Lightroom gives you the option to work ONLY on Smart Previews (you can access this option in the Performance section of your preferences - see image). Then once you're done editing and want to export, all the adjustments are then placed with the original full sized image. So speed and efficiency is a HUGE reason to use Smart Previews.

This image shows where to adjust the preference to use Smart Previews as a priority over Original image files.

The Second big reason to use Smart Previews, and this is my favorite, is the ability to work on your photos "offline" via Smart Previews. Now as you know Lightroom is a DATABASE system, it DOES NOT store your images (hopefully the capitalization gets my point across 😁). That of course means that Lightroom needs to have a "link" to your image file - it needs to know WHERE it is. Unless you have Smart Previews - WOW! Now since Smart Previews are stored in the Catalog File that means that wherever your catalog goes, your Smart Previews go. So if you're like me and work on a laptop and desktop computer all you need is a portable hard drive with your catalog on it and you can work on your images wherever the heck you are!

So for example, if you are on an airplane on your way to Fiji for a well deserved vacation you can work on your Smart Previews on your laptop (via your hard drive with the catalog) and then when you get back and connect your hard drive to your desktop (where the originals are stored) all the adjustments you made while on that plane halfway across the world will automatically sync and you can print all those beautifully processed images to your personal inkjet photo printer. That's exciting! Are you excited? I'm excited! I love Smart Previews!

Above is a screenshot indicating a file that is an Original file with a Smart Preview.

Above is a screenshot indicating a file that is an Original file with a Smart Preview.

Above is a screenshot indicating that the Original file is not present and you are working a Smart Preview only.

Above is a screenshot indicating that the Original file is not present and you are working a Smart Preview only.

So back to the original question in the title of this post, are Smart Previews worth your time? For ME, yes. For you maybe not. If you work solely on ONE computer and that computer is a stationary desktop computer then Smart Previews may not be worth your time - from the traveling catalog standpoint at least. But what about the performance standpoint? Well that's a case by case issue as well. If you have a quick processor and lots of RAM then it may not be worth your time. But if you run an older computer building Smart Previews may have some performance benefits for you. If there is any question, why not try it out? Build some Smart Previews of images already in your catalog and work on the Smart Previews and see if it speeds things up for you. So there you have it, Smart Previews! They're (potentially) AMAZING.


1 Comment
LLG_Banner2.jpg

Navigating The Library Module

January 9, 2018

The Library Module. So important but yet so... boring. The Library module is where the foundation of your oh-so important Lightroom workflow begins. And like any foundation it is important that it is solid and well understood. I know, I know, you want to get into the good stuff of Lightroom - the Development Module. We'll get there eventually but first we have to take care of the "nerdy" stuff. But stick with me and I promise you will be happy that you "nerded out" and built a strong Lightroom foundation! Now you can technically move on through all the modules of Lightroom with only the knowledge of the import process but please don't. Your future self will thank you for learning all you can about the Library Module and Workspace and building that strong foundation.

So this what your default Workspace looks like in the Library Module ⬇️ 

Library_all_empty.png

There is A LOT going on! Pictures and words and numbers and colors and shapes and it can be overwhelming. But while it appears overwhelming, Lightroom gives you the ability to customize just about everything in your workspace to minimize and declutter your Workspace. We will discuss customizing your Workspace in another post (and maybe a video). But for now I just want you to know WHAT all these things are.


At the very top of your Workspace you have your Identity Plate (on the left) and the Module Picker (on the right). 

Identity Plate : Modules.png

The Identity Plate does not serve much of a functional purpose, but if you use multiple catalogs (which I don't recommend) it can indicate which Workspace you are using as you can have different Identity plates for different Catalogs. 

The Module Picker is where you can pick what module you want to use - shocking, I know.


Just below the Identity Plate is The Navigator Panel.

Navigator.png

The Navigator panel displays a preview of your selected image and you can zoom and pan the selected photo.


Under the Navigator panel you can find the Catalog panel. The Catalog panel displays how many files are in your current Catalog. And you quickly access ALL Photographs, Synced Photographs, Quick Collection and the Previous Import.

Catalog.png

Folders.png

Beneath the Catalog panel is the Folders panel. There you can view and access different drives and folders.


The Collections panel can be found under the Files panel. In the Collections panel you can access and create different Collections. Collections are pretty great and they're going to get there own blog and /or video in the future.

Collections.png

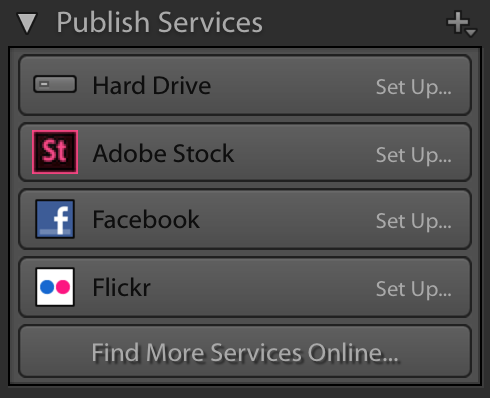
Publish.png

The last panel on the left side of your workspace is the Publish Services panel. This is where you can connect different services(i.e. Social Media accounts) to share your work to.


Below the Publish Services panel and spanning the bottom of your workflow screen in the Filmstrip. This is where you can view your images in a horizontal, scrolling fashion. There are also Filter options available above the Filmstrip.

filmstrip.png

Above the Filmstrip is the Toolbar. You can select different viewing modes and sort your images from the Toolbar. You can also accent the Painter tool and change the size of your thumbnails from the Toolbar. I generally don't use the Toolbar so I tap the "T" key to hide it.

Toolbar.png

Above the image display area of the workspace is the Filter Bar. From the Filter Bar you can filter images by a multitude of options. It's a great way to find images!

Filter Bar.png

Histogram.png

Moving on to the upper right portion of the workspace you will find the Histogram panel. The Histogram panel shows your selected images' information - ISO, Focal Length, Aperture and Shutter Speed. It shows whether you are working on an original image, Smart Preview or Original + Smart Preview. It can also show Highlight and Shadow clipping. The Histogram panel is one of the more important panels in the Library Module.


Below the Histogram panel is the Quick Develop panel. The Quick Develop panel is pretty self explanatory. You can make quick adjustments to your selected image(s) or load a preset of Develop settings and adjust the White Balance. I don't do much with the Quick Develop panel as I prefer to do most of my work in the actual Develop Module.

Quick_Develop.png

Keywording.png

Under the Quick Develop panel is the Keywording panel where you can add keywords to your images, see suggested keywords or use keyword sets.


Next is the Metadata panel and there are a BOATLOAD of options here. I keep mine set to Minimal but if you have time you should explore the Metadata panel to see what works for you.

Metadata.png
Metadata+.png

Comments.png

Finally, the Comments panel is at the lower right of your workspace and it displays comments that have been made on images you shared via the Publish Services panel. This image displays "Comments not supported here" because I have not set up Publish Services.


WHEW!! That was a lot of info but it's good information to know. I'm aware it's not the most exciting stuff in Lightroom but again, your future self will thank you for taking the time to learn it!

1 Comment
LLG_Banner2.jpg

Lightroom vs. Lightroom

December 17, 2017

Adobe made a big splash when in mid October they announced a new Lightroom... not a new version, an entirely new product... also called Lightroom. Well, technically the "new" Lightroom is called Lightroom CC and the "old" Lightroom is called Lightroom Classic CC. 

Lr_vs_Lr.jpg

Why would they do this? They have, probably, the most widely used software for photo editing in the world, so why change? Well, I don't know honestly. Adobe claims that new photographers were "intimidated" by the old Lightroom and the new Lightroom is easier to use and less intimidating. They also say that people were asking for a centralized place to store their photos (the cloud) and more intuitive photo syncing between mobile and desktop.

I can't really argue with their points as I don't work for Adobe and don't know what features other people request. But I will tell you why I won't be switching to Lightroom CC - at least not yet. Now, just so you know Adobe has said they will continue to update and improve Lightroom Classic CC ("old" Lightroom), so it's not going anywhere.  If you are a serious photographer or intend to be, and I assume if you're reading this you are, then you should stick with Lightroom Classic CC. Why? Well here's a list of just some options and tools that are not available in Lightroom CC:

  • HDR Merge
  • Panorama Merge
  • Ability to Rename Photos
  • History
  • Soft Proofing
  • Keyword Hierarchies
  • Snapshots
  • Custom Defaults
  • Organizing by Folders
  • Smart Collections
  • Survey and Compare Views
  • Sync Settings
  • No Map Module
  • No Print Module
  • No Web Module
  • No Slideshow Module

So... that's a pretty big list! Maybe it's because I'm a creature of habit or I'm not fond of change but I just don't like it! Photographers have spent years learning Lightroom, err I mean Lightroom Classic CC, and now they're throwing a whole new program at us! I don't want to store all my photos in the cloud. I don't want to create a new workflow. I don't want to be without all those tools. I realize that for some the new layout may be better and having all your photos on the cloud may seem nice but I am sticking with the "old" Lightroom. And besides with the recent updates to Lightroom Classic CC - the speed improvements and masking options - the future looks bright for the old guys!

Let me know in the comments what you guys think!

Comment
LLG_Banner2.jpg

RAW vs. Jpeg (and baking cookies)

December 16, 2017

Since photographers started using digital cameras the question has been around, RAW or JPEG? Now, I am a person who feels that people sometimes overthink when it comes to photography and make things more complicated when they could be much simpler if we just stopped overthinking. And that applies to RAW vs JPEG. We could dive into the fine details of each file type but we really don't need to do that.

Peeling away all the layers of overthinking leaves us with the fact that RAW gives the photographer more control - and thats good, we want control. When you shoot in RAW the image that you will see upon importing to Lightroom will probably look a little dull and flat and that's because it has NOT been processed - that's up to you to do when shooting RAW. If you shoot in JPEG the image will have more contrast and more "pop" and may look better initially because it IS being processed - by the camera, not you. But because the camera is processing the image for you it is also taking away your control. You can think of it like baking cookies. RAW gives you all the ingredients to make a fantastic cookie and you can decide if you want to make them chocolate chip or add M&Ms and Reeses Pieces and Hershey Kisses and Andes Candies or whatever you want! JPEG makes Chocolate Chip - that's it, hope you like it. If you shoot JPEG you take away control to bring back shadow and highlight detail and as you can see below you take away control to adjust color balance. 

This is the DNG RAW file. When you navigate the Color Balance submenu you can see the variety of options for adjusting the color balance.

This is the DNG RAW file. When you navigate the Color Balance submenu you can see the variety of options for adjusting the color balance.

This is a JPEG file. You can see in the Color Balance submenu to the right that the multitude of options has decreased to just 3 options.

This is a JPEG file. You can see in the Color Balance submenu to the right that the multitude of options has decreased to just 3 options.

So is there a downside to RAW? Sure there is. RAW files are generally bigger and take up more space. They take longer to import and take more processing power to adjust. If you shoot mobile some devices don't support shooting RAW. It takes special software (uh hmm..Lightroom) to process RAW images. But all these problems are being solved and soon most mobile devices will be able to shoot RAW - the Lightroom Mobile APP allows you to shoot in DNG - and storage is becoming cheaper by the second. So to me shooting RAW is a no brainer but for you JPEG may work better but I highly suggest, if possible, shoot in RAW - you can make better cookies!

1 Comment
LLG_Banner2.jpg

12.12.2017 Updates

December 12, 2017

LrUpdates.jpg

Today Adobe announced updates to the suite of Lightroom products. Notable in the update is the new "Auto" adjust and I have tested it out and the results are pretty darn good. Here's what Adobe had to say:

"Auto has been completely reworked to create better results, every time. Using an advanced neural network powered by Adobe Sensei, our artificial intelligence (AI) and machine learning platform, the new Auto Settings creates a better photo by analyzing your photo and comparing to tens of thousands of professionally edited photos to create a beautiful, pleasing image.  The new Auto is available ecosystem wide, including in Lightroom CC, Lightroom CC for iOS, Lightroom CC for Android, Lightroom CC on the web, Lightroom Classic, and Adobe Camera Raw (ACR)."


Also updated for Lightroom Classic CC is the Color Range Masking Tool. Adobe has made it easier to remove sample points. You can remove a sample point by holding down the Alt (Win) or Option (Mac) key while using your mouse to select the sample point.


There were some other minor updates and one "BIG" update to Lightroom CC (not Lightroom Classic CC - don't get them confused they aren't the same - not even close...yet). And the update is the addition of the Tone Curve!! Now if you've used Lightroom at all in the past you know that the Tone Curve has been a staple of the program for years! And that is a perfect example of why I won't be doing training on Lightroom CC - it is WAAAYY behind Lightroom Classic CC. 

Ok. That's all I've got for now. Let me know of any questions you have in the comments below or shoot me a message. 

Comment
LLG_Banner2.jpg

Why DNG?

November 19, 2017

Lightroom, and the digital darkroom in general, has lots of ins and outs and small details here and there. One of those seemingly small details is the DNG format. I use the DNG format and lots of professional photographers also use the DNG format. But what is it? It is simply a RAW file format. DNG stands for Digital Negative and was created by Adobe as kind of a "standard" RAW file. And well, I'll just let Adobe tell you what the benefits are. The information below is taken directly from their site.

For photographers:

  • DNG format helps promote archival confidence, since digital imaging software solutions will be able to open raw files more easily in the future.
  • A single raw processing solution enables a more efficient workflow when handling raw files from multiple camera models and manufacturers.
  • A publicly documented and readily available specification can be easily adopted by camera manufacturers and updated to accommodate technology changes.

So for me it's a simple step to create the DNG file when I import and adds a little insurance. Let me know in the comments below if you have any questions!


1 Comment
LLG_Banner2.jpg

Importing Images: Copy as DNG, Copy, Move, Add. Huh?

November 19, 2017

When importing your images into Lightroom you have four options as to how to handle their location and file type. The first option, "Copy as DNG", is actually the only option that changes the file type and is the one that I use and recommend you use as well (I explain more in this post here). It converts your image into DNG format and copies the image from your source (likely a memory card) to a new destination (likely your main hard drive). Next, the "Copy" option does pretty much what it says, simply making an exact copy from your source to your destination. The "Move" option takes the images from your source and transfers them to your destination, removing the files from the source in the process. And lastly the "Add" option simply adds the information to the Lightroom Catalog but does not change the location of the image file.

import_options_ss.jpg

So when would you use these different options. I will start by saying that when you are importing images from a memory card, like we commonly do, the options to "Move" and "Add" are not available. Why not? Well, neither option ensures that you have a copy of your images (Adobe makes the assumption, out of caution, that you will be importing images via a memory card that is likely to be reformatted or deleted) and Adobe doesn't want to hear it if you accidentally delete your images from your memory card after using the "Move" or "Add" option - leaving you with no actual images. So an example of when you would use the "Add" option would be if you have a hard drive of images that you want imported to Lightroom (remember Lightroom really just wants to know where your images are - database system) but don't plan on relocating those images - say an older hard drive that you don't necessarily use much but might at some point . An example of when you would use the "Move" option would be if you have images on a hard drive and you want to place those images on a new hard drive - maybe when your current hard drive is getting low on space and you need a bigger drive. Both of these methods ensure that Lightroom knows where your images are but neither creates a copy of your images. The "Copy" option does exactly what it says. It takes the images, again commonly from your memory card, and copies them to your destination folder and of course gives the Lightroom Catalog the info it needs - file location, metadata etc. Lastly, "Copy as DNG" does the exact same thing as "Copy" - copying images to a new destination, informing Lightroom of file location and metadata - BUT it also converts the image to the .dng format. DNG is essentially an Adobe created RAW file format but it definitely has benefits (see this) and adds a bit of insurance.

Just to review, "Copy as DNG" - YES

                        "Copy" - Maybe

                         "Move" - NO

                         "Add" - NO

Let me know your thoughts and questions in the comments below!


Comment

What is The Lightroom Catalog?

November 10, 2017
catalog_link.jpg

The Lightroom Catalog is the core of Adobe Lightroom Classic CC. It's the engine that drives the car, without it Lightroom wouldn't be Lightroom - it would be Photoshop Lite. So what is it?

If you want to be brief and basic the Lightroom Catalog is simply a database. But why does image editing software need or want to have a database? Your images are files and you want to access those files so why not just have software based on a file folder system? Well, in one word - speed. If Lightroom were based on a file folder structure it would be incredibly slow. Also Adobe already has a really good file folder system in Adobe Bridge. And you can use Bridge in conjunction with Photoshop or any other image editing software but the benefits of Bridge fade when using Lightroom. But let's get back on track here. The catalog holds - in it's database - metadata such as flags, color labels, star ratings and keywords that you assign to images. It also contains the commands that you input to adjust color, contrast, aspect ratio etc. By using commands in place of permanent actions, like an actual file adjusting system would, it makes things very quick and uses minimal processing while also being non-destructive. And this is the second important factor as to why Lightroom uses a database catalog system. 

A major benefit of using Lightroom is that it is a non-destructive workflow. Now, what do we mean by a non-destructive workflow? Let me give you an example. Say you shot some great pictures the the sunrise over Lake Huron. Those pictures are on some sort of removable drive in your camera and you transfer them to your computers hard drive. So there they sit waiting for you to make them look snazzy and eventually print them out. So you look through them and find one that you really think looks great and you open it in Photoshop. You adjust the shadows, take care of some color issues and crop it to a new aspect ratio. It looks great so you save it! But what you've done in saving those changes is destroyed the original pixels(destructive editing!). Let's say you were "smart" and saved it with a different name as a copy so as to keep the original. So now you have 2 copies... BUT now you want to see it in black and white so you convert and save it as another copy.... You haven't destroyed any pixels but now you have 3 copies of one image! That's a lot storage space for 1 click of shutter! Plus it can get very confusing having so many copies.

Now with Lightroom if you took that same picture and did the same adjustments - the cropping, the converting to black and white, everything - you are doing absolutely nothing to the original image. You could find that image in its folder and it would look exactly the same as when you took it - because it is exactly the same (you can even create a "snapshot" or a "virtual copy" that also don't take up any space but that will be covered in a different post). You have simply sent commands to the Lightroom database instructing Lightroom how you want the image to appear when you Export (share or print) the image.  So it is a completely non-destructive workflow.

Take a look at the little flow chart below and hopefully you have a better understanding of the Lightroom Catalog and please let me know in the comments below if there are any more questions about the Catalog that I can answer for you! And two final tips - 1) keep backups of your catalog! 2) only have one Catalog!

flowchart.jpg
Comment
← Newer Posts

Latest Posts

Summary Block
This is example content. Double-click here and select a page to feature its content. Learn more
Featured
Jun 1, 2025
Porta
Jun 1, 2025
Jun 1, 2025
May 25, 2025
Etiam Ultricies
May 25, 2025
May 25, 2025
May 18, 2025
Vulputate Commodo Ligula
May 18, 2025
May 18, 2025
May 11, 2025
Elit Condimentum
May 11, 2025
May 11, 2025
May 4, 2025
Aenean eu leo Quam
May 4, 2025
May 4, 2025
Apr 27, 2025
Cursus Amet
Apr 27, 2025
Apr 27, 2025
Apr 20, 2025
Pellentesque Risus Ridiculus
Apr 20, 2025
Apr 20, 2025
Apr 13, 2025
Porta
Apr 13, 2025
Apr 13, 2025
Apr 6, 2025
Etiam Ultricies
Apr 6, 2025
Apr 6, 2025
Mar 30, 2025
Vulputate Commodo Ligula
Mar 30, 2025
Mar 30, 2025